Scheduling a Template
When you have created at least one template, you can schedule templates. Tap the row of the template you want to schedule to see the detail on the template. Tap the Schedule button to start the scheduling wizard.
Scheduling Wizard
Step One
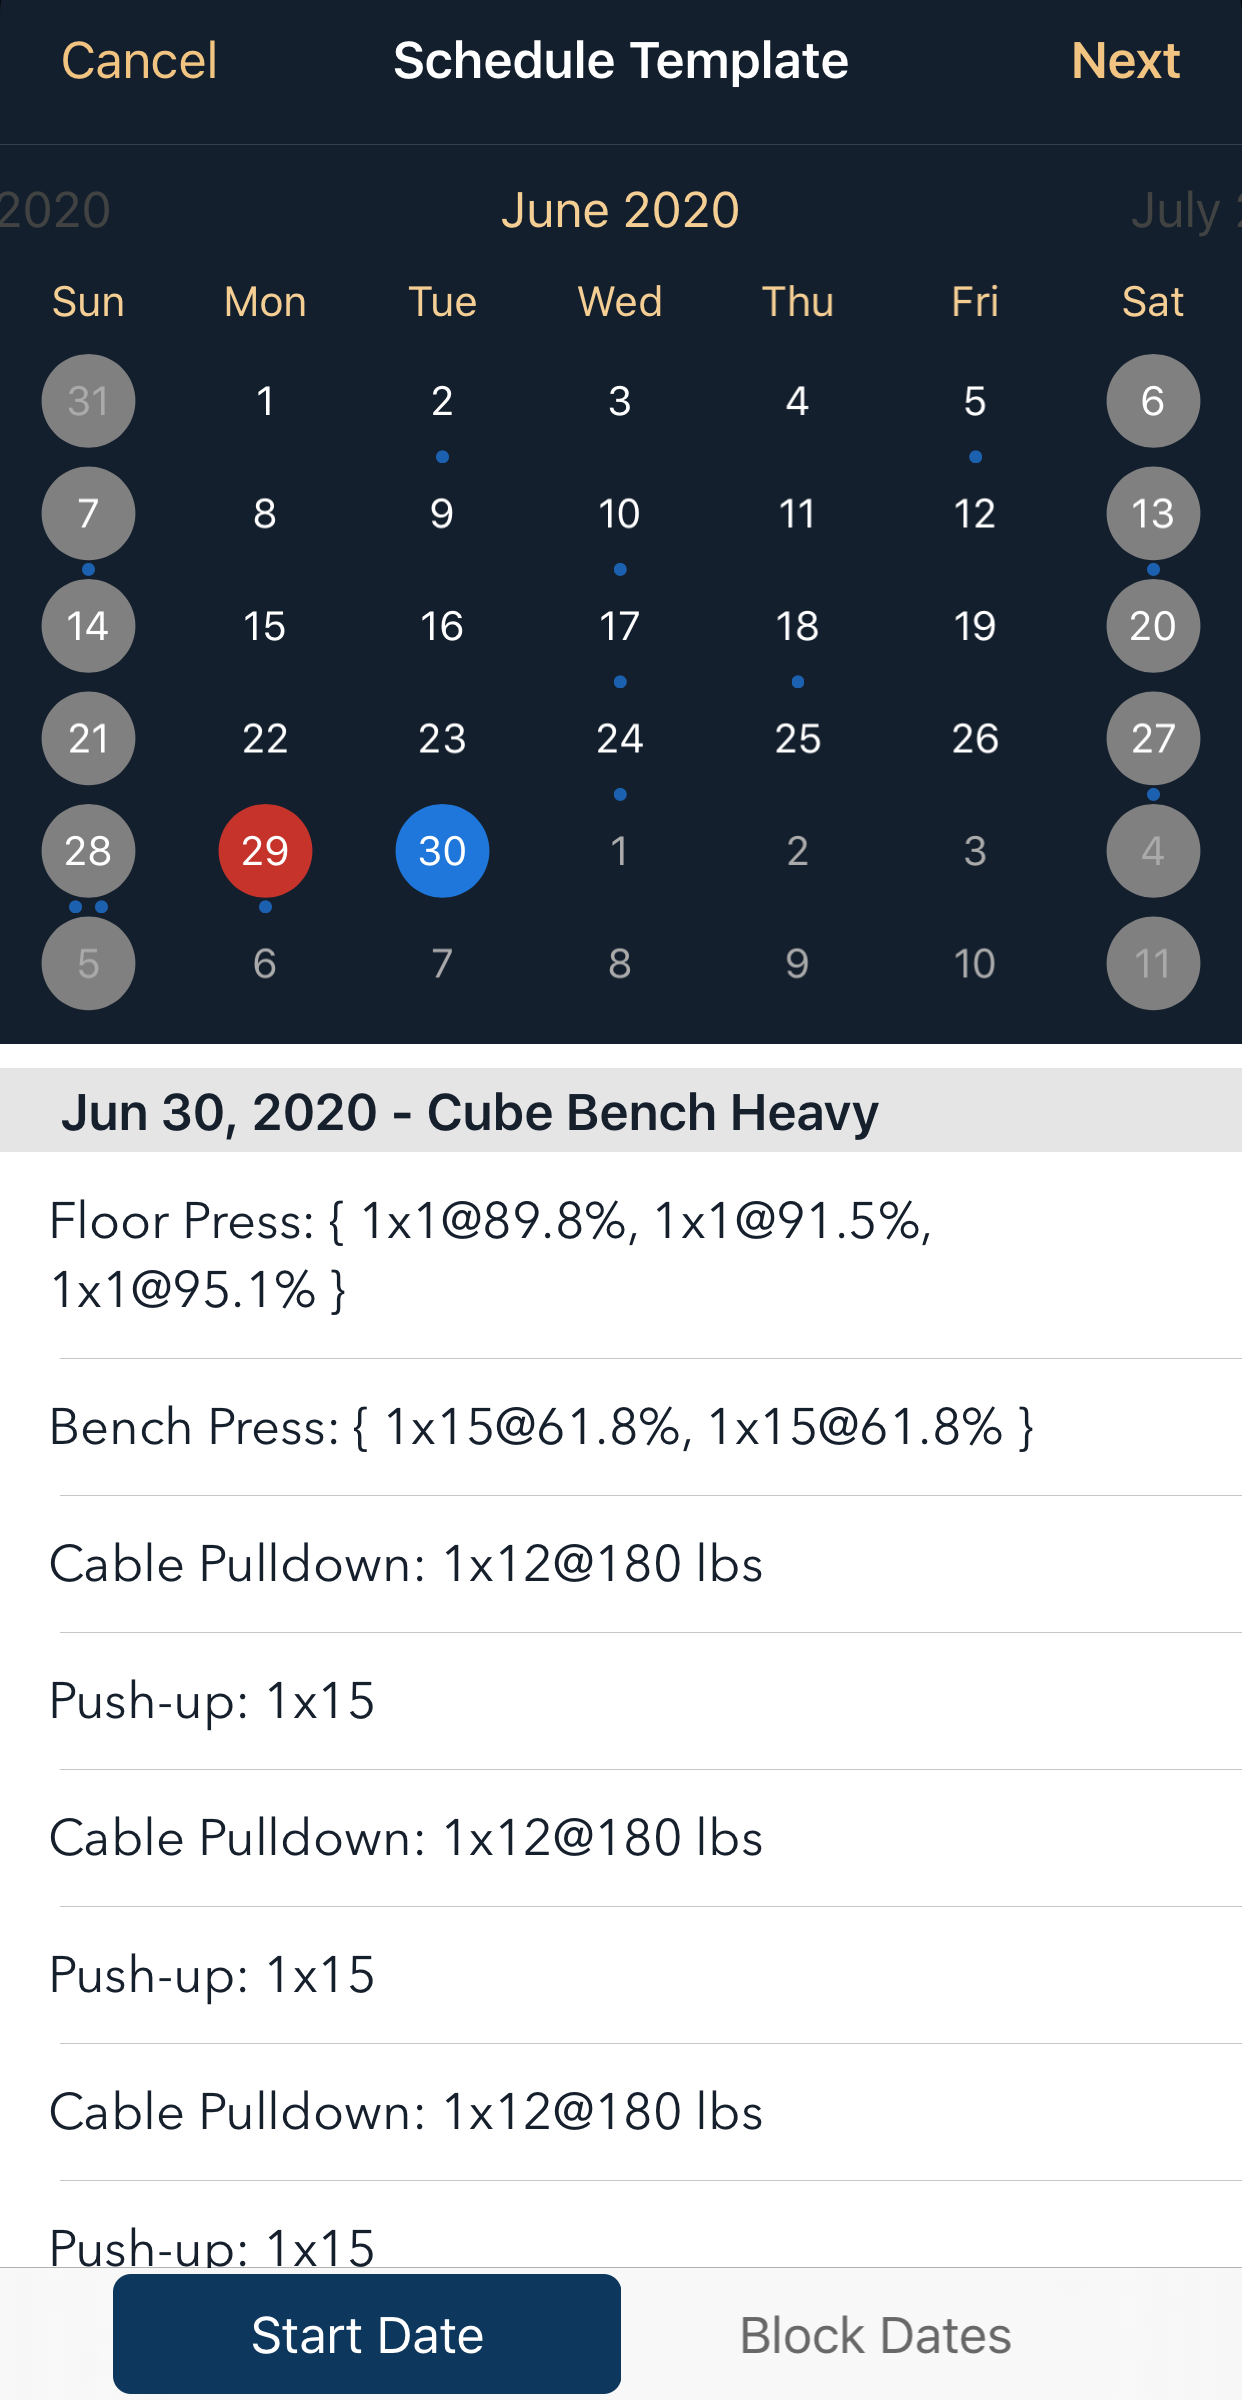
The first step in the scheduling wizard is to choose dates from the schedule template calendar. Select your desired start date and then tap Next or Finish.
Step Two (Conditional)
If you have selected sets with exercises that use one rep max, the next step is to adjust the training max and the one rep max value of any exercises that may be used in your template.
For example, if you have a four week progression based program that has you increasing your target weight on your exercises between cycles, you would use this screen to increase the weight according to your program. When you’re satisfied that all the parameters of the scheduled template are what you want, tap the Save button. It will now schedule the template according to the start date, the dates in the template, and the weights and training maxes you have set up. You’re ready to use your new template.

Schedule Controls
There are two modes: Start Date and Block Dates.
Start Date
Use Start Date to set the start date of a template. For templates that are longer than one day, it will calculate the days in the template according to the days that are available for gym. It will respect any rest days built into the template.
Block Dates
Use the Block Dates mode to block any days that are unavailable for scheduling a workout. If you know you can’t make it to the gym on a certain day, toggle the date you can’t make it by tapping the date tile. The date tile will change to a gray circle. To make the date available again, tap it again so that the gray circle disappears.
Browsing Dates
To browse to other months in the calendar, swipe the calendar left or right.